
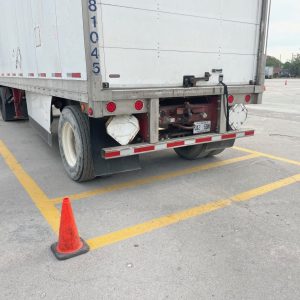
A tractor-trailer can be loaded, fueled, and ready to roll, but it does not move until the driver confirms the air brakes are building and holding pressure correctly. For a CDL student, this system is more than a pre-trip item to memorize. It is a safety system you must understand well enough to inspect, test, and explain under pressure.
Air-brake knowledge is part of becoming job-ready for commercial driving. Whether you plan to drive a tractor-trailer, box truck, dump truck, or bus, knowing how the system responds helps you protect yourself, your cargo, and everyone sharing the road.
How Air Brakes Work on Commercial Vehicles
Unlike a passenger car that uses hydraulic fluid to apply brake pressure, commercial vehicles use compressed air. The engine-driven air compressor supplies air to reservoirs, or tanks. That stored air travels through lines and valves to operate the brakes when the driver presses the pedal.
The system is designed with safety in mind. If a truck loses too much air pressure, it cannot rely on normal service braking. That is why commercial vehicles also use spring brakes. Powerful springs apply the parking and emergency brakes when air pressure drops too low. Air pressure holds those springs back during normal operation.
Three brake systems work together on most air-brake-equipped vehicles:
- Service brakes apply when you press the brake pedal during normal driving.
- Parking brakes hold the vehicle in place when it is parked.
- Emergency brakes apply through the spring brake system if air pressure becomes dangerously low.
The basic parts matter because CDL examiners may ask you to identify or demonstrate them. You should recognize the compressor, governor, air tanks, air lines, brake chambers, slack adjusters, drums or rotors, and the brake pedal. You do not need to be a mechanic, but you do need to know what each part does and what a problem can look or sound like.
Why the Air Brakes Test Matters
The air brakes portion of CDL training is not designed to trick drivers. It checks whether you can recognize a condition that could lead to brake failure. A driver who skips an air-pressure test may miss a leak, a low-pressure warning problem, or a parking brake that will not hold.
For many CDL applicants, the challenge is not the system itself. The challenge is following the test sequence in the correct order while explaining each step clearly. Reading about the test helps, but repetition in a real truck is what makes the process feel natural.
A failed air brakes knowledge or skills requirement can limit the type of commercial vehicle you are allowed to drive. Depending on the testing result and license class, you may receive an air-brake restriction. That can close off many trucking jobs because most Class A tractor-trailers use air brakes. If your goal is broad job access, take this section seriously from the first day of training.
The Air Brake Check You Need to Practice
Your state handbook and instructor should always be your final guide, since testing procedures must be followed exactly. Still, the standard air brake check follows a logical pattern: build pressure, check for leaks, test warnings, and confirm the spring brakes apply.
Start by securing the vehicle. Park on level ground when possible, set the parking brakes, and use wheel chocks if required. Then start the engine and let air pressure build while watching the gauges. You are checking that the compressor and governor can bring the system up to its normal operating range.
During a typical CDL skills test, you may be asked to perform these checks:
- Build air pressure until the governor cuts out, commonly around 120 to 140 psi.
- Turn off the engine, release the parking brakes, and check the static air-loss rate. A combination vehicle generally cannot lose more than 4 psi in one minute.
- Apply firm pressure to the brake pedal and check applied air loss. A combination vehicle generally cannot lose more than 4 psi in one minute.
- Fan the brake pedal down and confirm the low-air warning activates before pressure falls below 60 psi.
- Continue fanning the brakes until the spring brakes apply automatically, typically between 20 and 45 psi.
Those numbers are not random. They show that the system holds air, warns the driver early enough, and applies the emergency braking system before pressure becomes too low to safely operate the vehicle.
Do not rush through this check. Watch the gauges. Listen for air leaks. Say each action out loud when practicing. If you are taking a skills exam, clear communication helps the examiner see that you understand what you are checking.
Common Air Brake Mistakes CDL Students Make
Many students understand the steps but lose points because they make small procedural errors. One common mistake is testing air loss without fully releasing the parking brakes. If the brakes are still set, you are not checking the system the way the test requires.
Another is failing to let the air pressure build high enough before beginning. If you start the leak test before the governor cut-out point, your results may not be valid. Students also sometimes pump the pedal too quickly during the low-air warning test and miss the exact point when the warning comes on.
Memorizing numbers without understanding the purpose can also create trouble. For example, if you know the low-air warning should activate before 60 psi but do not know why, it is easier to forget the step when you are nervous. The warning gives the driver time to stop safely before the spring brakes apply.
Finally, do not treat the air brake check as something that only matters on test day. Real drivers perform daily inspections because air systems face wear, vibration, moisture, damaged hoses, and leaking connections. A small problem in the yard can become a serious problem at highway speed.
What to Look for During a Pre-Trip Inspection
The air brake check is only one part of a complete pre-trip inspection. Before driving, look for damaged air lines, loose connections, audible leaks, cracked brake drums, and brake components that appear contaminated with oil or grease.
When inspecting the foundation brakes, check that brake chambers are securely mounted and not damaged. Look at slack adjusters and push rods for obvious damage or excessive movement. If the vehicle uses manual slack adjusters, adjustment is a maintenance task that must be handled correctly. Do not guess or attempt repairs you are not qualified to make.
Air tanks also deserve attention. Moisture and oil can collect in the system, especially in humid conditions. Some trucks have automatic drain systems, while others may require manual draining as part of normal maintenance. Your responsibility as a driver is to identify defects, report them, and avoid operating an unsafe vehicle.
Hands-On Practice Builds Speed and Confidence
You can study air brakes from a manual, but you learn the rhythm of the inspection inside a truck. You need to see how fast pressure builds, hear the warning alarm, feel the brake pedal, and watch the gauges respond. That experience reduces test-day hesitation.
At East USA Trucking School, students can practice in a real commercial driving environment instead of trying to learn every skill from a book. Repeating the air brake check with an instructor helps you correct the order, use the right language, and build the confidence needed for CDL testing.
If English is not your first language, do not let technical terms stop your progress. Learn the names of the parts in the language that helps you understand them, then practice the terms and test sequence required for your CDL exam. The goal is not to sound complicated. The goal is to inspect the truck correctly and drive safely.
Air Brakes Are a Career Skill, Not Just a Test Section
A CDL can create access to steady work, but employers expect drivers to arrive ready to operate safely. Air brake knowledge signals that you understand the equipment you are trusted to drive. It can also help you spot a problem before it becomes a roadside breakdown, missed delivery, or out-of-service violation.
Take the time to practice the full sequence until you can perform it calmly, accurately, and without prompts. The best feeling on test day is not hoping you remember the steps. It is knowing you have already done them enough times to trust your training.