You can know the CDL manual front to back and still fail if you cannot show the examiner you can control a commercial vehicle safely. That is why understanding what is on the CDL skills test matters before you schedule your appointment. The test is not one long drive around town. It is a hands-on evaluation with three separate parts: the pre-trip inspection, basic vehicle control, and the road test.
For most Class A applicants in Florida, each part must be passed before moving to the next one. A mistake in one section can mean ending the test early or returning another day to retest. The good news is that none of the skills are mysterious. They are learnable when you practice them in the right order, on the right equipment, with enough room to repeat the maneuvers.
What Is on the CDL Skills Test?
The CDL skills test is designed to prove that you can inspect, maneuver, and operate a commercial motor vehicle without creating a safety risk. The examiner is not looking for fancy driving. They are looking for control, awareness, proper procedures, and safe decision-making.
The exact scoring details and routes can vary by testing location and vehicle class, but the core skills test has three parts. You will complete a vehicle inspection, demonstrate backing maneuvers in a controlled area, and drive on public roads while following traffic laws and commercial driving procedures.
For a Class A CDL, you will generally test in a combination vehicle, such as a tractor and trailer. The equipment you test in matters. If you test in an automatic vehicle, you may receive an automatic transmission restriction. If you test without air brakes or without a full tractor-trailer setup, restrictions may also apply. Choose a training and testing plan that matches the type of jobs you want after licensing.
Part 1: The Pre-Trip Vehicle Inspection
The pre-trip inspection is where many students feel overwhelmed. There are a lot of components to remember, and the examiner expects you to identify parts, explain what you are checking, and point out whether each item is safe.
This portion is not about reciting random truck parts. It is about showing that you would catch a serious defect before taking a commercial vehicle onto the road. A loose wheel, leaking hose, damaged tire, missing reflector, or unsafe coupling connection can cause a major crash or put a driver out of service.
During a Class A pre-trip, you may be asked to inspect areas such as the engine compartment, steering components, suspension, brake system, wheels and tires, lights and reflectors, fuel tank, cab, coupling system, trailer, and rear of the vehicle. You also need to perform in-cab checks, including warning lights, windshield wipers, mirrors, heater and defroster, horn, parking brakes, and service brakes.
For air brake vehicles, expect air brake checks. You need to know how to build air pressure, test for leaks, verify warning devices, and check that the parking and emergency brakes engage correctly. These steps must be performed in the proper sequence. Saying the right words while skipping a required action will not help.
The best way to prepare is to use the same routine every time. Start at one point on the truck, follow a consistent path, and use clear language. Instead of trying to memorize a speech in one night, practice by physically touching or pointing to each component. Repetition turns a long inspection into a dependable work routine.
What Examiners Want to Hear
When describing most parts, a strong answer includes three things: the component is securely mounted, it is not cracked, bent, or damaged, and it has no leaks. Then add the specific condition that applies. For example, tires should have proper tread depth, proper inflation, and no cuts or sidewall damage. Brake hoses should not be cut, cracked, chafed, or leaking.
Accuracy matters more than speed. Move with purpose, speak clearly, and do not rush through components you have not actually checked.
Part 2: Basic Vehicle Control and Backing
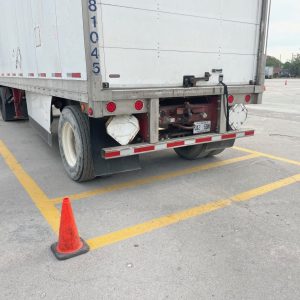
The basic control section takes place off the public road in a designated skills area. This is where you demonstrate that you can control the truck and trailer at low speed while backing into specific positions.
For many Class A students, backing is the hardest part of the CDL skills test because the trailer responds in the opposite direction of the steering wheel. Small corrections matter. If you wait too long to correct, you may lose the setup and use up valuable space.
The maneuvers commonly include straight-line backing, offset backing, and alley docking. Depending on the test requirements, you may need to pull forward, reposition the vehicle, or back the trailer into a simulated loading space. You are scored on boundary violations, pull-ups, exiting the vehicle, improper backing, and failure to complete the maneuver within the allowed limits.
A pull-up is not automatically a failure. In many situations, a controlled pull-up is better than forcing the truck into a bad position. But pull-ups are limited, so use them wisely. The same goes for getting out to look, often called GOAL. Checking your position can prevent a major error, but it must be done safely: secure the vehicle, exit correctly, look at the setup, and return to the cab without rushing.
Backing Is About Setup, Not Guesswork
New drivers often stare at the trailer and try to fix every movement with a big steering correction. That creates more problems. Strong backing starts with a clean setup, slow movement, and regular mirror checks.
Keep your speed low enough to stop immediately. Watch both mirrors, not just the side where you can see more of the trailer. Know where the trailer tandems, rear corners, and tractor are in relation to the lines or cones. If the trailer begins moving away from your intended path, make a small correction early.
A large practice yard makes a real difference here. You need room to repeat the maneuver, make mistakes safely, and learn why a setup works before test day. At East USA Trucking School, students train in a practical four-acre environment where they can spend time building those backing habits instead of trying to learn them in a crowded parking lot.
Part 3: The CDL Road Test
Once you pass the inspection and basic control sections, you move to the road test. This is your opportunity to show that you can operate the commercial vehicle safely in normal traffic conditions.
The examiner may direct you through city streets, intersections, turns, lane changes, railroad crossings, highway driving, merges, and stops. You may also encounter bridges, curves, low-clearance signs, work zones, or areas with pedestrian traffic. You will not know every situation in advance, which is the point. Safe commercial driving requires you to read the road, not memorize a route.
During the road test, the examiner watches for proper mirror use, lane position, speed control, following distance, braking, signaling, turns, gear selection when applicable, and traffic awareness. They also watch whether you obey signs and traffic signals, stop fully when required, and approach hazards with enough time to react.
Wide turns are a major concern in a tractor-trailer. Turning too tight can cause the trailer to run over a curb, strike an object, or enter another lane. Turning too wide can place the truck in the path of oncoming traffic. You must position the vehicle correctly before the turn, use your mirrors throughout the turn, and keep the trailer clear.
Railroad crossings are another area where procedure matters. Commercial drivers must recognize posted restrictions, check for trains, and follow required stopping rules. Low clearances matter just as much. A bridge that clears a passenger car may not clear your trailer. Professional drivers constantly scan ahead for height limits, lane restrictions, and changing traffic conditions.
Common Reasons Applicants Do Not Pass
Most failed skills tests come down to preparation, not lack of potential. Students may know what they should do but have not practiced enough to do it calmly under pressure.
Common problems include skipping parts of the pre-trip inspection, using too many corrections while backing, failing to check mirrors, striking a curb, rolling backward, making an unsafe lane change, or missing a traffic sign. Serious safety errors can result in an automatic failure. These may include causing a crash, violating a traffic law in a dangerous way, driving over a curb, or requiring the examiner to intervene.
Nerves can make small issues worse. The fix is not to rush. Take a breath, listen to the instruction, set up properly, and use the same safe procedures you practiced. The examiner is evaluating your driving, not trying to trick you.
How to Prepare for Test Day
Start with your permit knowledge, but do not stop there. The skills test is physical and procedural. You need time in the driver’s seat, time under the hood, and time repeating maneuvers until they become routine.
Practice your pre-trip inspection out loud. Practice backing in the same sequence until you understand your reference points. Drive in different traffic conditions with an instructor who will correct unsafe habits before they become test-day mistakes. If you are returning to driving after time away or need to remove an automatic restriction, targeted refresher training can be a smarter choice than trying to figure it out alone.
On test day, bring the documents required for your appointment, wear closed-toe shoes, arrive early, and avoid last-minute cramming. Your goal is simple: show that you can inspect the truck, control it in tight spaces, and drive it safely in traffic. Train for those three jobs with consistency, and the CDL skills test becomes a clear step toward getting to work.